In this blog post, we are going to learn how to load structured data from our computer into Snowflake.
Loading local data into Snowflake: before you begin
- Set up data warehouse & database: Make sure the data you are about to import has a “Home” within Snowflake, that being data warehouse, database, and schema being set up. If you’re not sure how to create those, check out our previous blog post on Snowflake 101: Setting Up Environment and Database
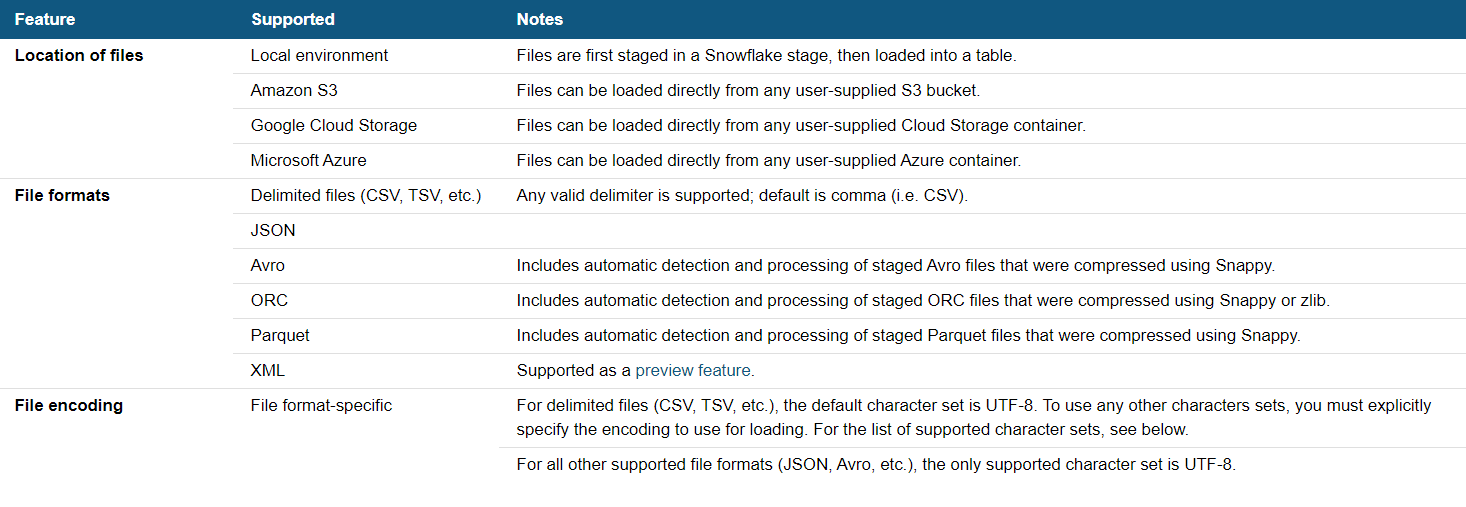
- File format: The format of our file must be suitable for Snowflake. See the documentation from Snowflake below to make sure that your file type is supported.
Download this file to follow along: Superstore_Sales.csv
Step 1: Create Table
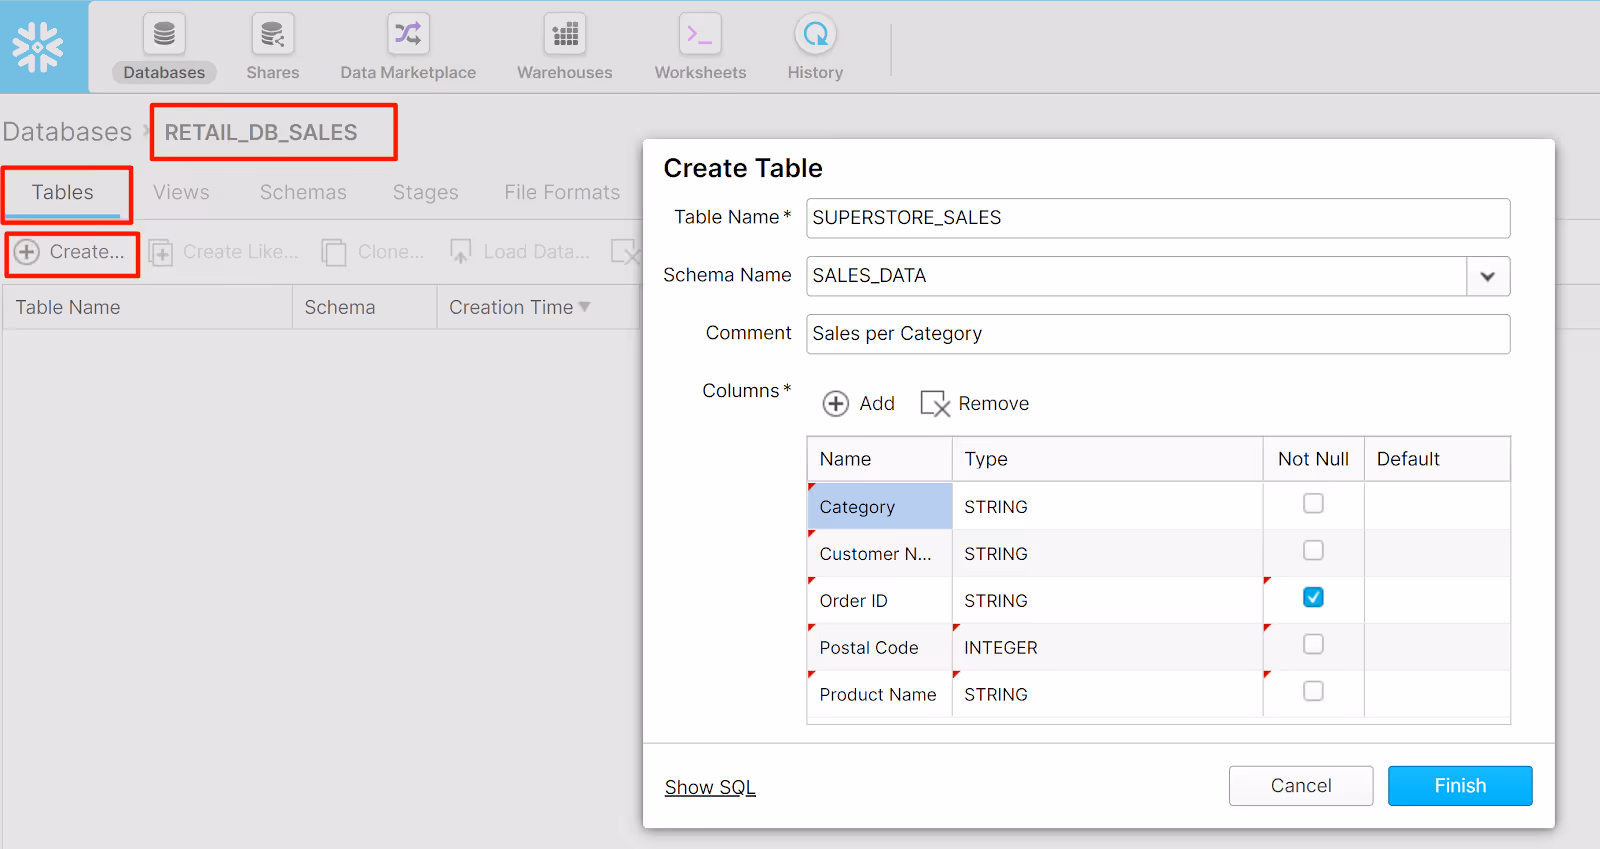
- Drill into your database by clicking the database name. In case you’re following our previous tutorial, this would then be RETAIL_DB_SALES.
- From the table tab, click Create
- When the Create Table dialog box opens, put in the Table Name as SUPERSTORE_SALES
- Leave the Schema Name as SALES_DATA
- Provide a short Comment about the data, such as “Sales per Category”
- In the column section of the dialog, click + sign to add a new column detail. Check your data and adjust the type accordingly. If you expect the column to never be Null, then click on the Not Null column
- Finish
As an alternative to the UX, you can also create the table using query in the SQL Query Pane by running the code below:
USE WAREHOUSE SNOWFLAKE_WH;
USE DATABASE Retail_DB_Sales;
USE SCHEMA Sales_Data;
CREATE TABLE "RETAIL_DB_SALES"."SALES_DATA"."SUPERSTORE_SALES"
("Category" STRING,
"Customer Name" STRING,
"Order ID" STRING NOT NULL,
"Postal Code" INTEGER,
"Product Name" STRING NOT NULL,
"Quantity" INTEGER NOT NULL,
"Sales" INTEGER NOT NULL,
"Segment" STRING,
"Sub-Category" STRING)
COMMENT = 'Superstore Sales per Category';
Step 2: Import CSV from Local Drive
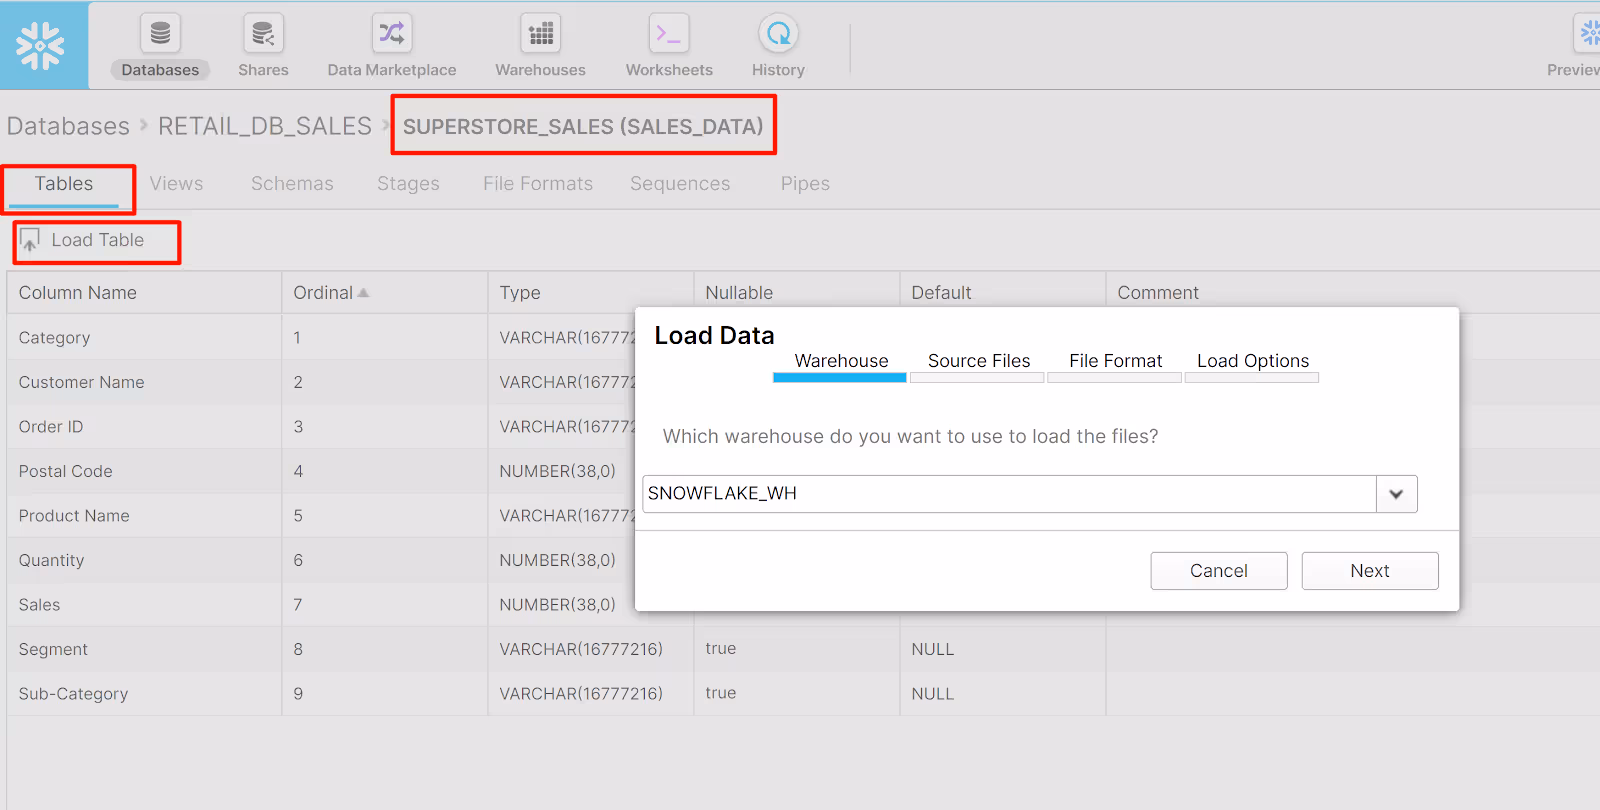
- From the breadcrumb trail, make sure that you are still in SUPERSTORE_SALES(SALES_DATA) table
- From the table tab, click Tables
- Click Load Table. You can see from the pop-up that there are four steps here being Warehouse, Source Files, File Format, and Load Options
- Warehouse (to carry out the work): select SNOWFLAKE_WH -> Next
- Source Files (to identify the file we want to load): Select Load Files From Your Computer -> Next
- File Format (provide details of our file format): Click on the + sign
- Now go back to Tables option, make sure that in the breadcrumb trail, you see Databases > RETAIL_DB_SALES > SUPERSTORE_SALES (SALES_DATA). If not, select SUPERSTORE_SALES data from the table list. Then choose Load Table.
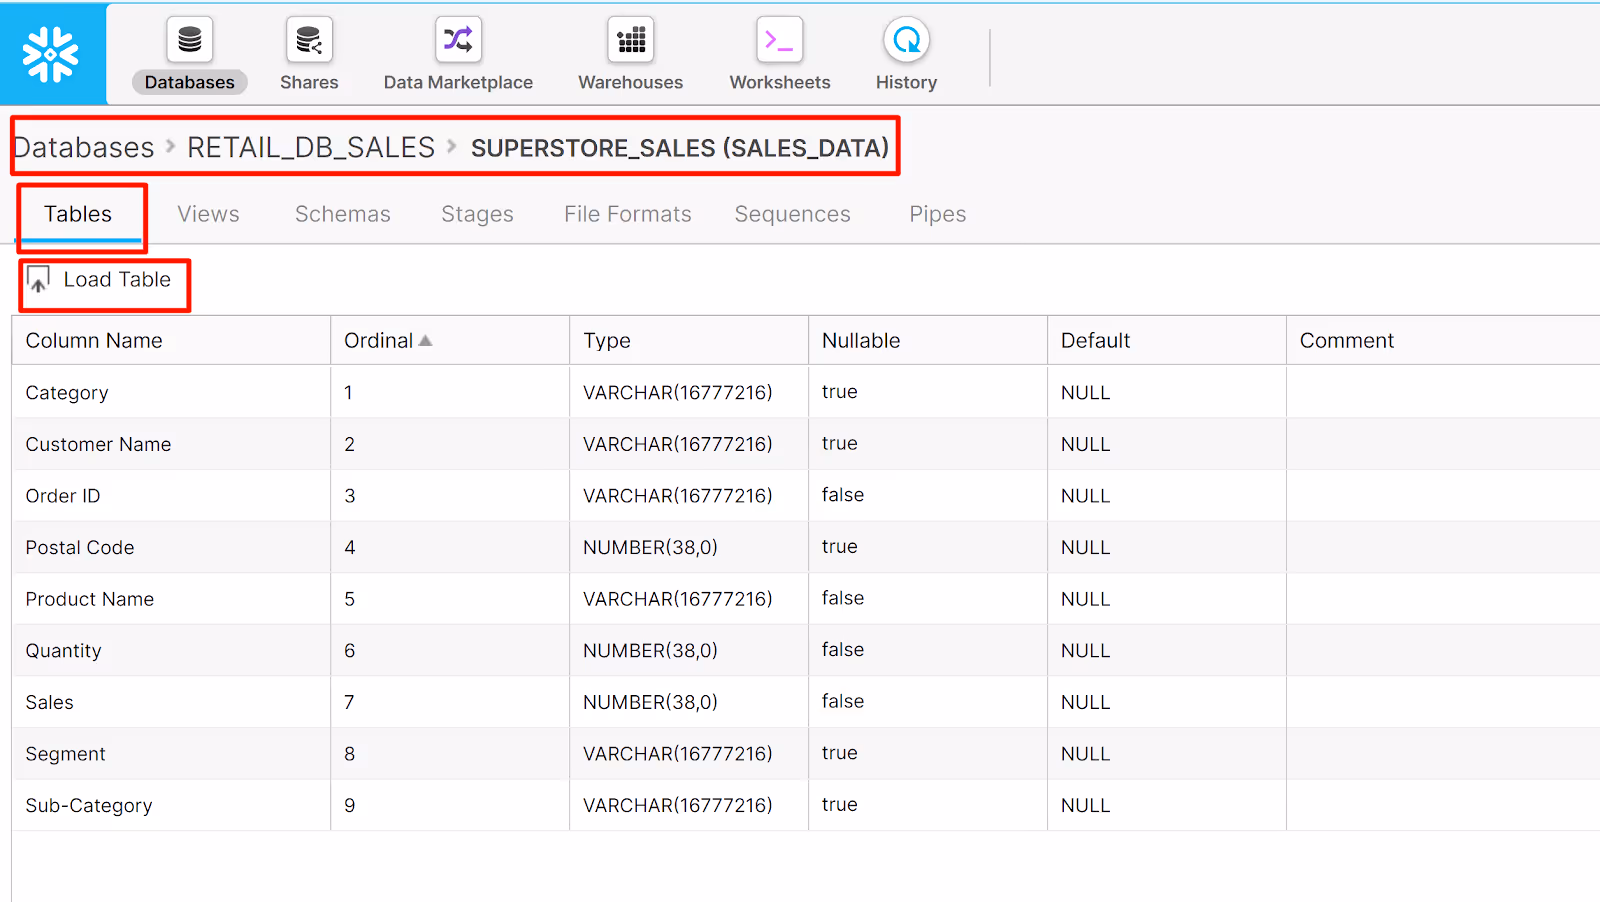
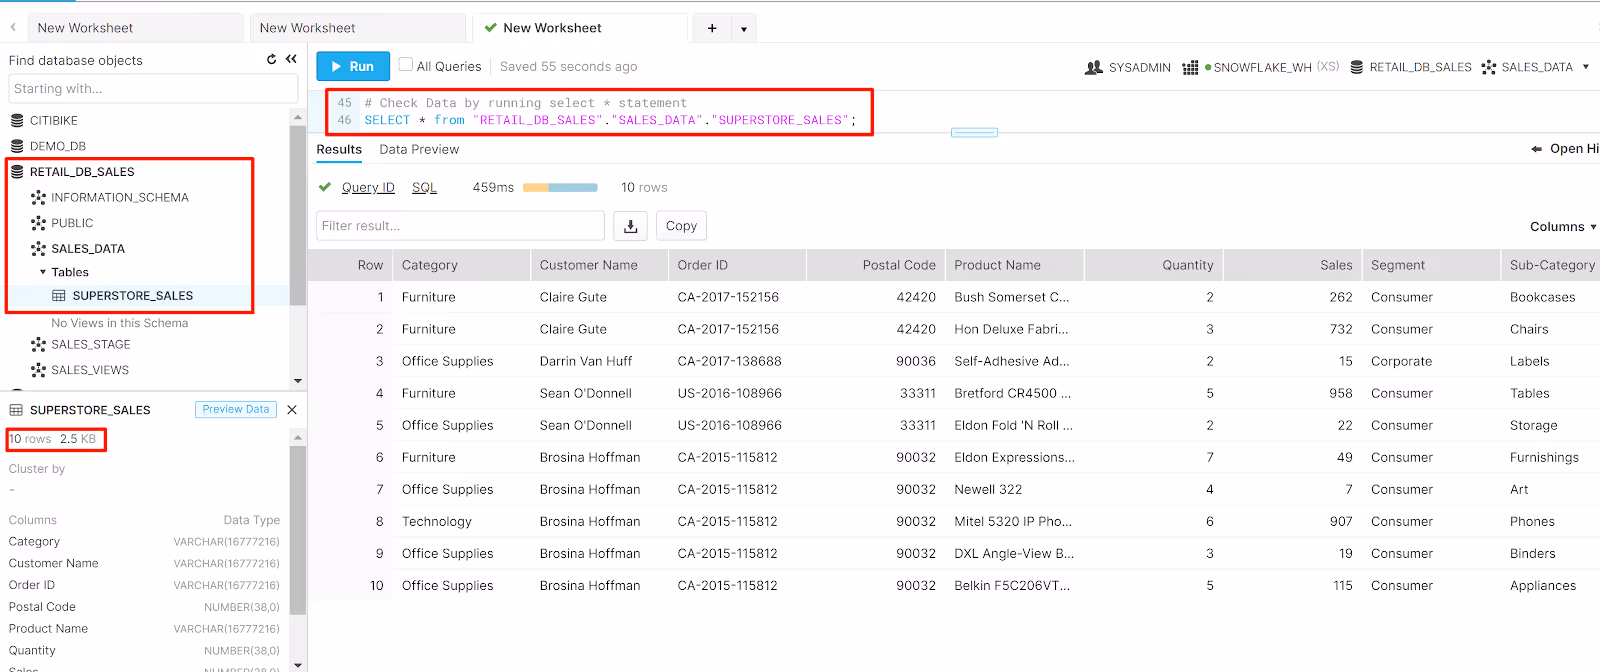
- You may now navigate to the RETAIL_DB_SALES database in the Navigation Pane and see that the SUPERSTORE_SALES table is there. You can also run a simple SELECT * statement or click Preview Data in the Preview Pane to view the data you’ve loaded.
In the Create File Format dialog box, provide the information below:
- Name: Sales_Data_Comma
- Column separator: Comma
- Header lines to skip: 1
- You can change other options as you’d like but for now, we will leave the remaining by default
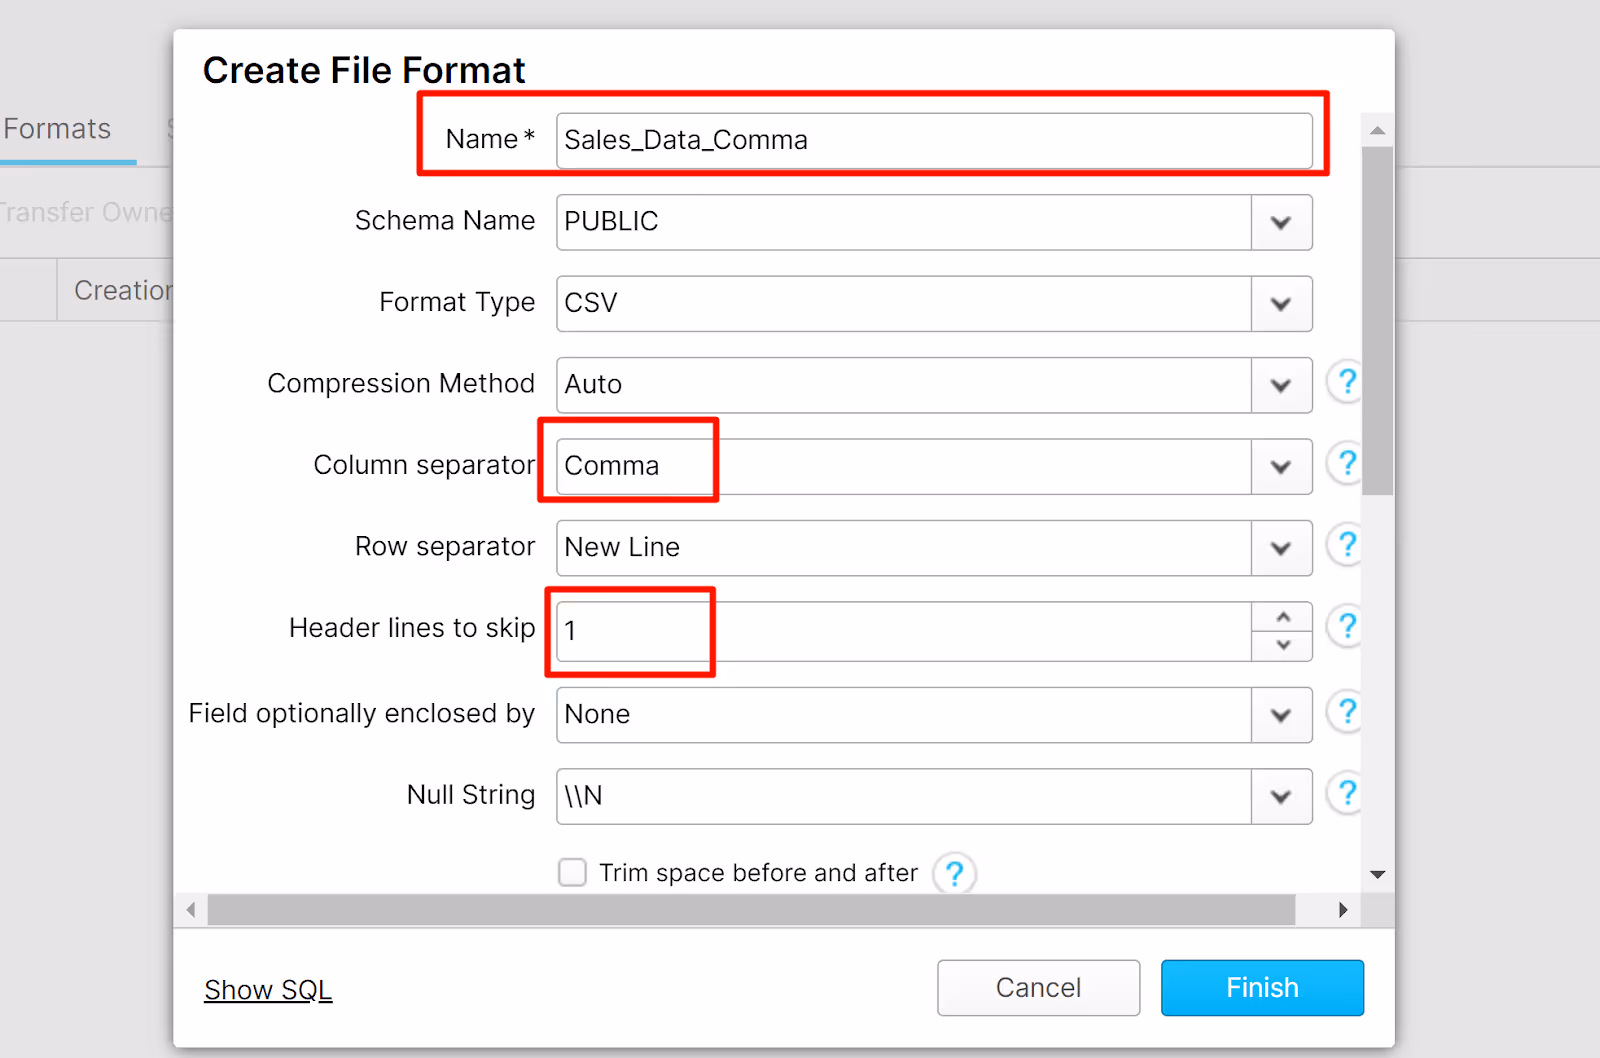
- Finish
You can also replace this whole step 6 with this piece of code below:
USE WAREHOUSE SNOWFLAKE_WH;
USE DATABASE Retail_DB_Sales;
USE SCHEMA Sales_Data;
CREATE FILE FORMAT SALES_DATA_COMMA
TYPE = 'CSV'
COMPRESSION = 'AUTO'
FIELD_DELIMITER = 'Comma'
RECORD_DELIMITER = '\n'
SKIP_HEADER = 1
FIELD_OPTIONALLY_ENCLOSED_BY = 'NONE'
TRIM_SPACE = FALSE
ERROR_ON_COLUMN_COUNT_MISMATCH = TRUE
ESCAPE = 'NONE'
ESCAPE_UNENCLOSED_FIELD = '\134'
DATE_FORMAT = 'AUTO'
TIMESTAMP_FORMAT = 'AUTO'
NULL_IF = ('\\N');
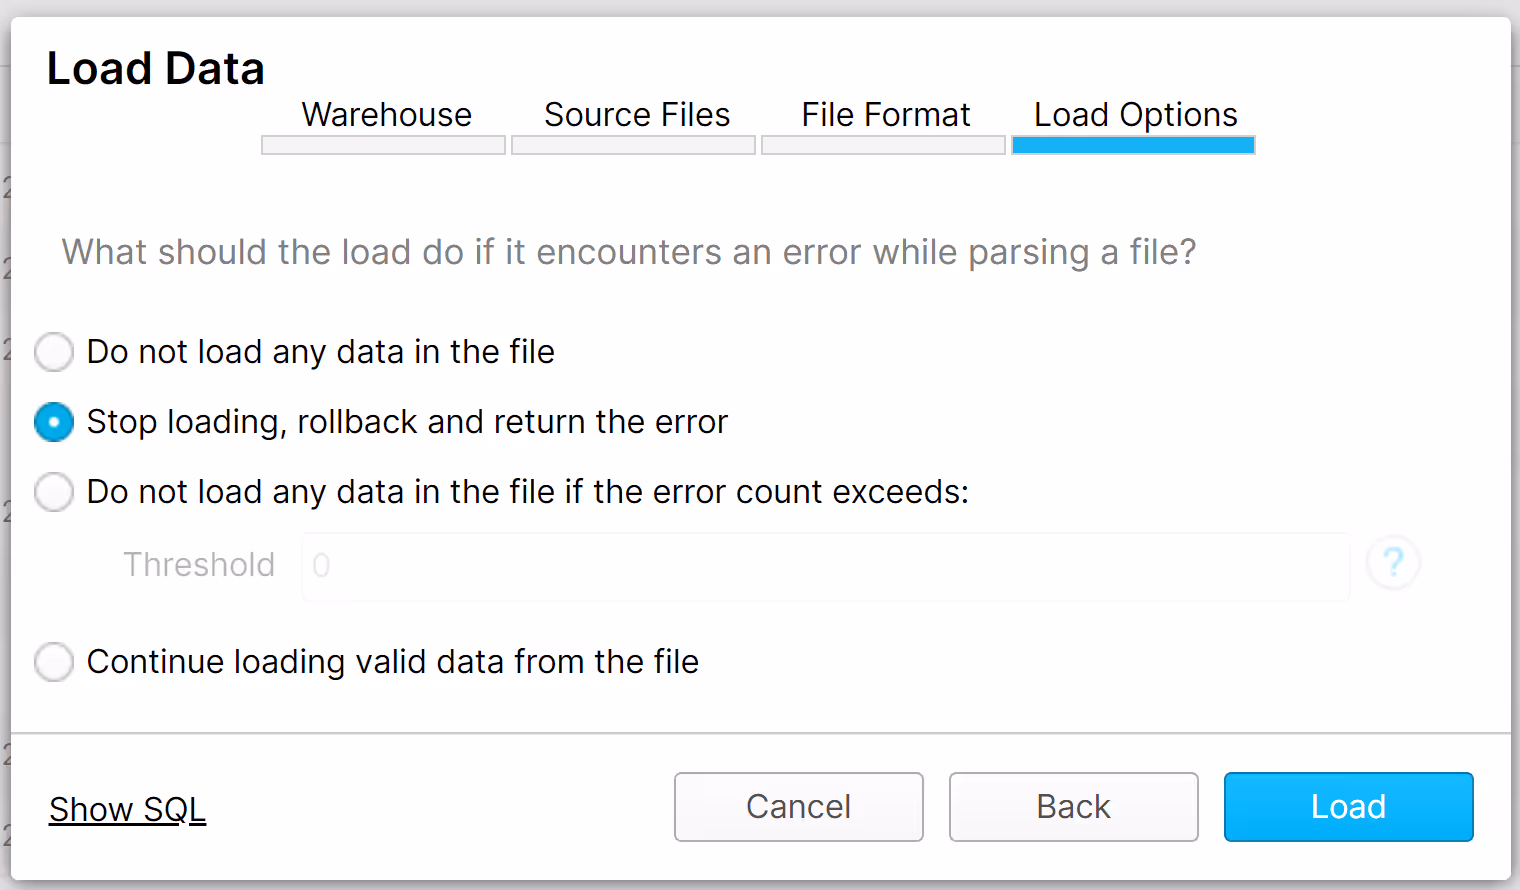
The Load Data will pop-up as below. Follow these steps below:
- Warehouse: choose SNOWFLAKE_WH
- Source File: choose Load Files from your Computer, then Load the Superstore_Sales.csv you downloaded in the beginning of this tutorial
- File Format: choose SALES_DATA_COMMA from the drop down
- Load Options: select the second option (Stop loading, rollback, and return the error)
- Load.
This is the pop-up you will see once the data is successfully loaded.
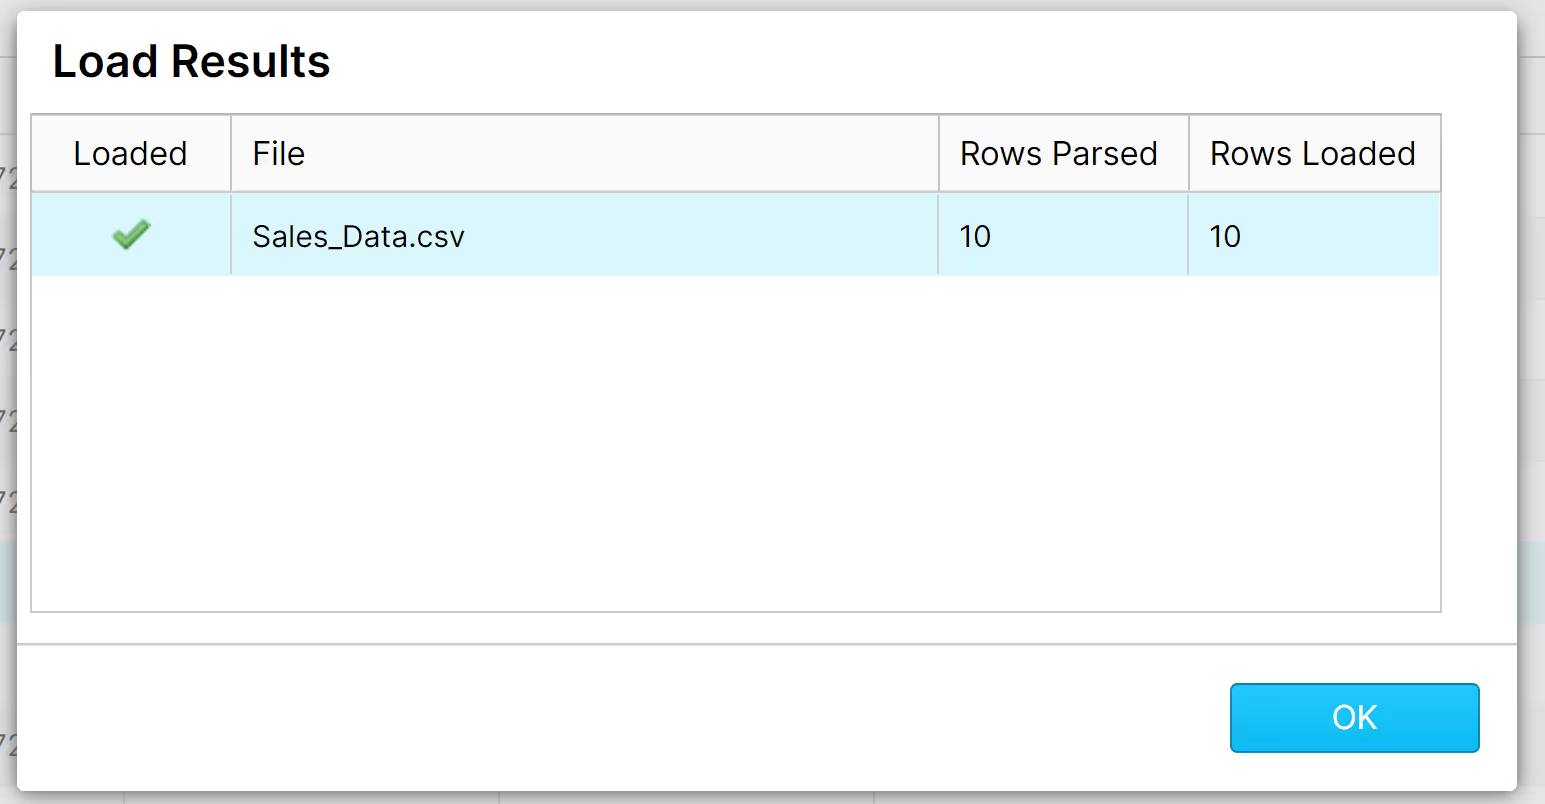
If your file does not load and you don’t understand the issue, you may want to try some of the other Load Options from step d. You can choose the option “Continue loading...” that would let you see which rows successfully loaded and allow you to see which rows did not.
Congrats! You’ve made it so far and that means that you are ready to tackle the next challenge on how to Import a CSV from Cloud storage.
Want more? Learn how to load structured data from AWS S3 into Snowflake here.