Logins, UserIds, Passwords, and lots of them: the story of my life as a consultant. If your organization uses Google Apps for single sign-on, wouldn't it be great to use this Google login to sign in to Tableau Server as well?
This post will show you how to enable OpenID on Tableau Server so you can login using via Google Single Sign-On (SSO).
For using OpenID, verify that your Tableau Server meets following specification:
- Using local authentication (not Active Directory)
- Tableau Server version 9.2 or higher
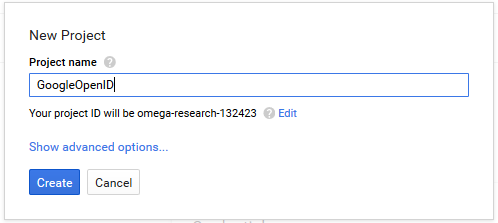
Step 1: Create a Google Developer Console project
Click this link and create a new project:
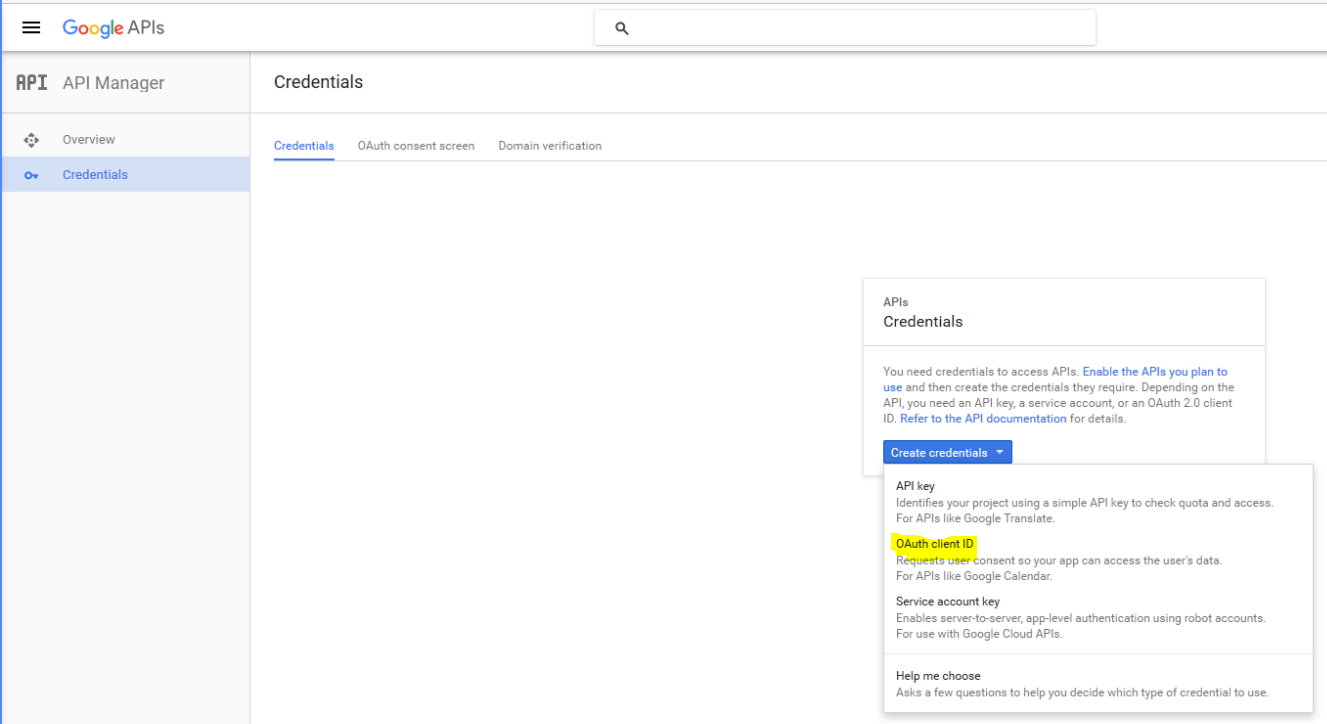
Step 2: Within the Console project, add new API credentials
Select OAuth Client ID.
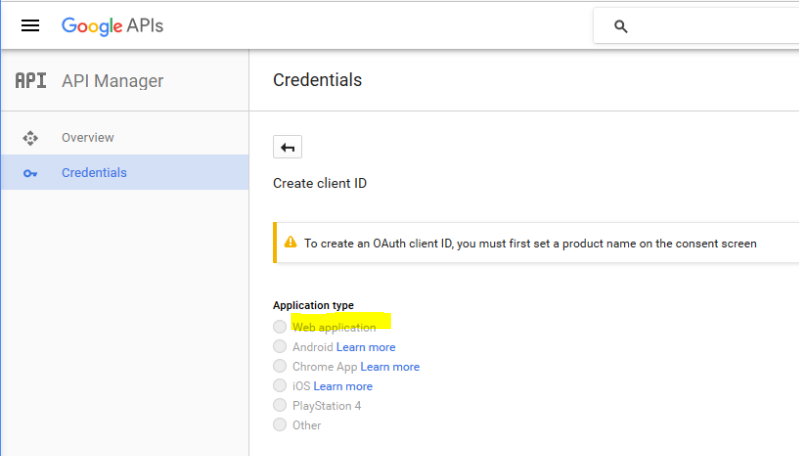
Choose the web application type.
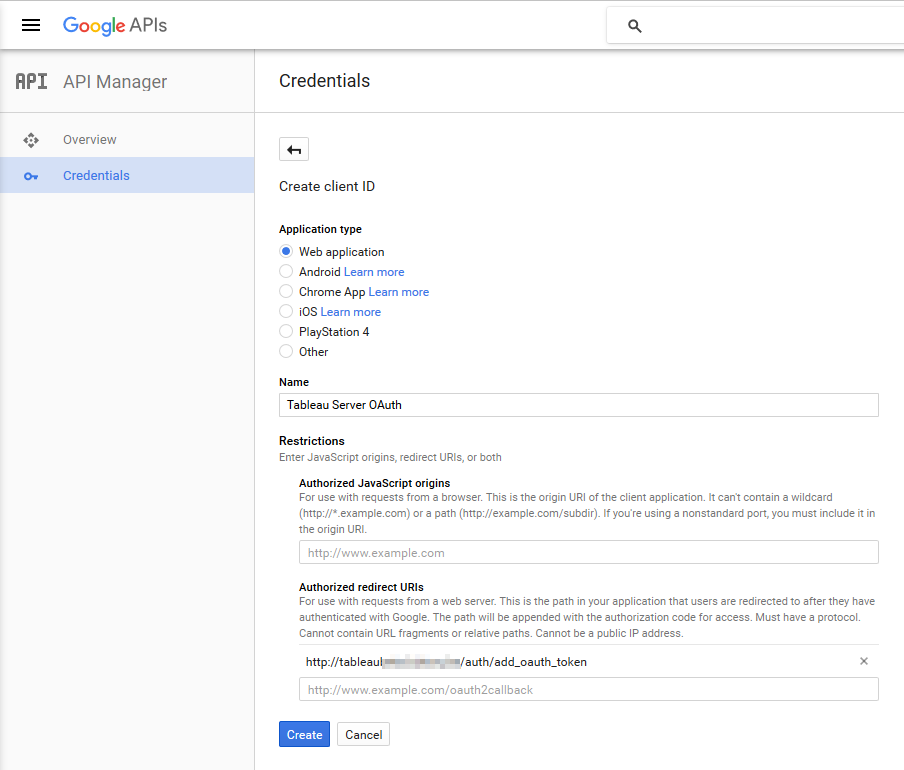
Step 3: Specify the ClientID credentials
Name the web client.
For Authorized Redirect URI, replace the existing text with the external address for your Tableau Server, followed by "auth/add_oauth_token".
https://your_server_url.com/auth/add_oauth_token
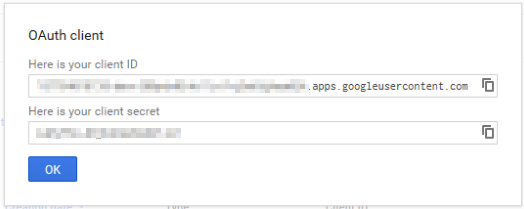
After that, hit the Create button and a window pops up with your OAuth ClientID and Client secret. Both of them are needed to configure the Tableau Server. Copy these some place (such as a Notepad document).
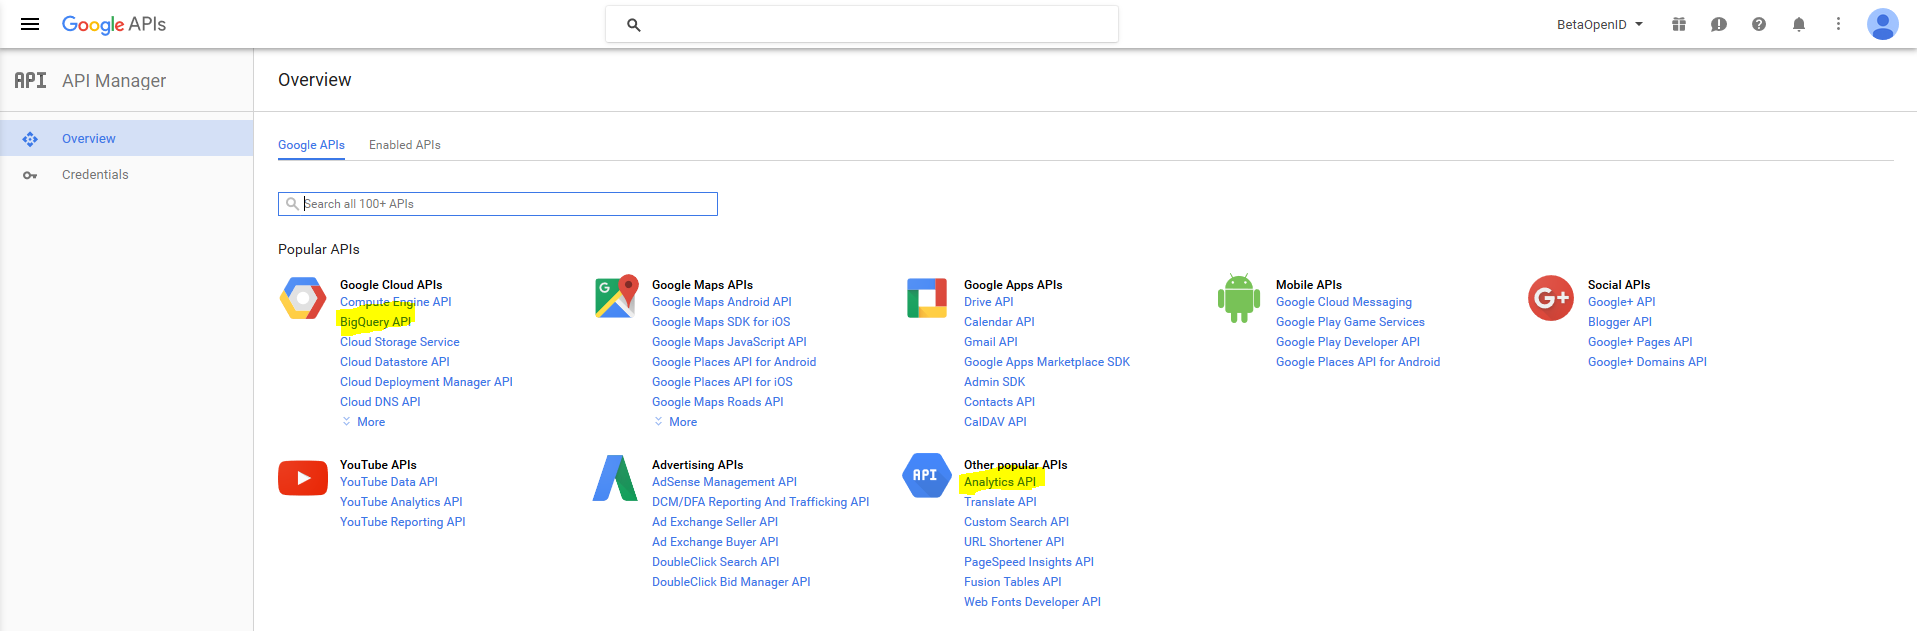
Step4: Enable APIs
Before we can configure the Tableau server, we must enable following APIs in your developers console:
- Big Query API
- A data platform for customers to create, manage, share and query data
- Analytics API
- The Analytics API provides access to Analytics configuration and report data
This concludes the configuration of the OAuth client. The next step is to configure the Tableau Server to use this OpenID.
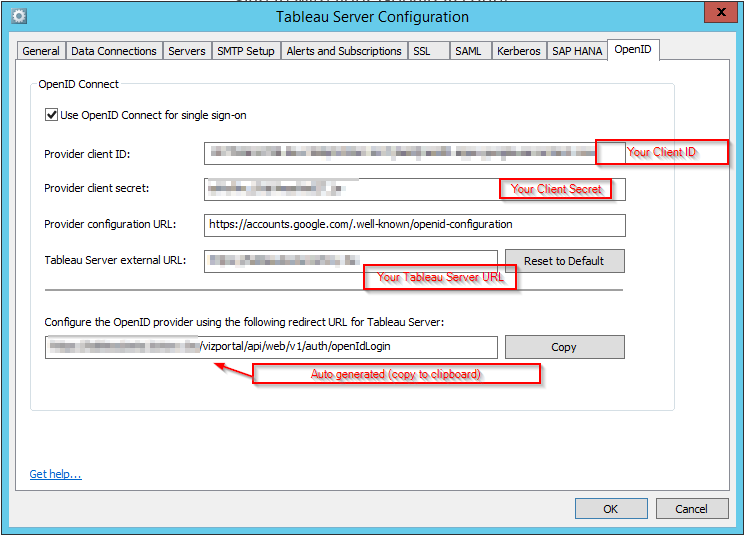
Step 5: Configure Tableau Server
You'll need the following information that we gathered in the previous steps:
- Client ID
- Client secret
Other information:
- Tableau Server external URL
- Provider configuation URL
- for Google, this is https://accounts.google.com/.well-known/openid-configuration
Next:
- Stop Tableau Server
- Open Tableau Server Configuration
- Select the OpenID tab
- Configure OpenID as shown in the image below
- Copy the redirect URL to clipboard
- Click OK
- Start Tableau Server
Step6: Modify your ClientID Credentials
Go back to the Developers Console to edit the ClientID credentials.
Paste the Tableau Server redirect URL into the Authorized redirect URIs
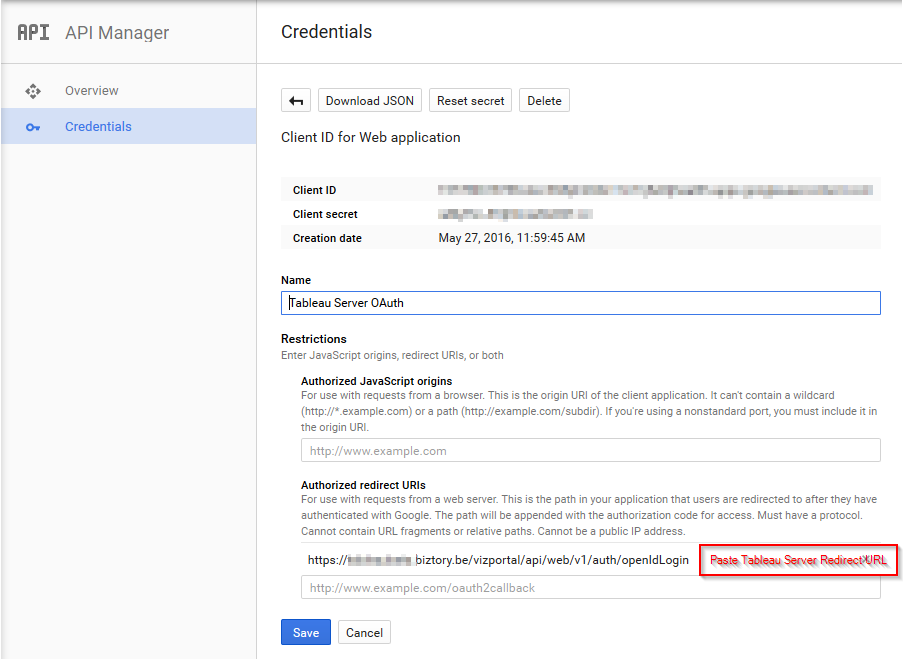
Hit the Save button.
Step 7: Test setup
To test the setup, make sure your Tableau Server contains the named users. NOTE: The user ids in the Tableau Server must be the Google Apps email addresses.
Next:
- Open Tableau Server external URL
- Fill in Google credentials
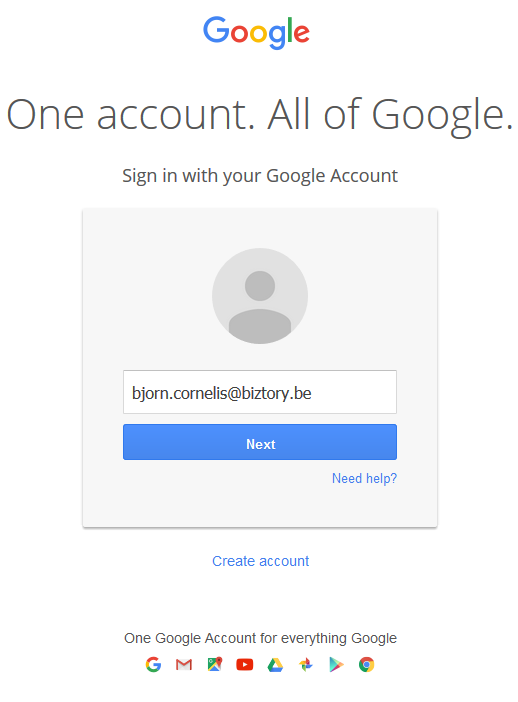
You get automatically redirected to the Tableau Server.